


Photo by Mehdi MeSSrro on Unsplash
All about React Three Fiber and 3D models : Quick & Easy Beginner's Guide
In this tutorial, you'll learn how to create a 3D object and display it in a browser in just a few easy steps.


Are you looking for a way to create stunning 3D experiences on the web, but find working with the raw WebGL API too difficult and time-consuming🥱?
Well, you're in luck🤞! React Three Fiber (R3F) is a library that enables you to build 3D scenes with React in a more efficient and user-friendly way. Whether you're a developer looking to learn more about 3D model animations on the web or have had limitations with using Three.js with React, R3F is the perfect tool to take your projects to the next level.
If you're a beginner and don't know anything about R3F, don't worry - by the end of this tutorial, you'll be able to create and display your very first 3D model on the web 😎!
What is react-three-fiber?
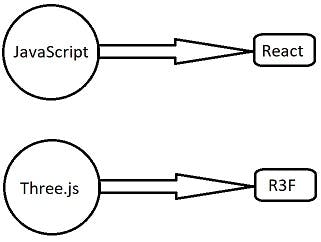
R3F is a React renderer for Three.js on the web and react-native. R3F is made on top of Three.js. So we must know the basics of Three.js when using R3F. Just like React is made on top of JavaScript, so we must know the basics of JavaScript when using React.
Three.js is a popular and powerful library for creating 3D graphics in the browser, and it uses Canvas + WebGL to display 3D models and animations. Before diving into R3F, I strongly recommend getting familiar with at least the following core concepts of Three.js.
Scene
Camera
Light
Mesh
Geometry
Materials, Textures & Shaders
Getting Started with Code </>
Step 1 - Create React App
If you have previously installed create-react-app globally, I recommend uninstalling it using this command npm uninstall -g create-react-app. Now, you'll be able to install the latest version of create-react-app using the following command.
# NPM
npx create-react-app my-3d-app

# Yarn
yarn add create-react-app my-3d-app
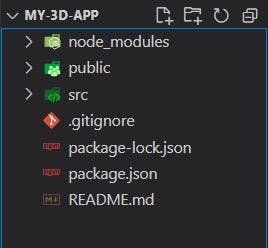
It will create a folder named my-3d-app. Open this folder in the code editor (I'm using VScode). You will see a folder structure like this:
(Note: While the official React documentation recommends not using create-react-app, I have chosen to use it for the sake of simplicity in this tutorial. For beginners, it's a good way to start)
Step 2 - Install required libraries
# NPM
npm i three react-three-fiber

# Yarn
yarn add three react-three-fiber
Here three is the core library that is required to use react-three-fiber. That's why we need both.
Step 3 - Run the app in the Browser
Time to see it in the browser!
# NPM
npm start

# Yarn
yarn start
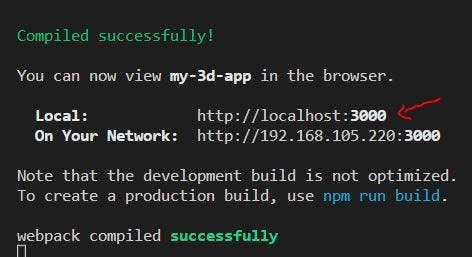
After a few seconds, a local port (localhost:3000) will be generated which you can open in your browser.
Go to the "src" folder
Delete these files:
App.css,App.test.js,setupTests.js, andserviceWorker.js(if it exists).Open
App.jsand delete all the existing code.Copy the code from the provided image and paste it into
App.js.
(Note: 💻Always type out the code yourself instead of copying it. This will help you better understand and remember the code)
// App.js
import React from "react";
import { Canvas } from "react-three-fiber";

// Cube Component

// App component
const App = () => {
  return (
    <>
      <Canvas>
        <Cube />
      </Canvas>
    </>
  );
}

export default App;
Understand the code:
<Canvas></Canvas> - It's a component that provides a blank space on a web page where you can create and display 3D graphics, much like how we need a blank canvas to paint something. 🖌🖼
<Cube /> - You'll see an error that says 'Cube' is not defined. This is because we haven't created the Cube component yet. So, let's create it now.
Step 4 - Create a 3D Cube
- Create a
Cubecomponent above theAppcomponent.
// Cube Component
const Cube = () => {
  return (
    <>
      <mesh>
        <boxGeometry attach="geometry" args={[1, 1, 1]} />
      </mesh>
    </>
  )
}
Understand the code:
The Mesh is like a container that holds 3D objects, lights, and materials to display on the Canvas. So, inside the Cube component, we use the
<mesh></mesh>tags to define the container.Then place a
boxGeometryinside the mesh with a width, height, and depth of 1 unit i.e.args={[1, 1, 1]}which will create a cube on the screen.How to show other geometries?
1. Go to threejs.org. 2. Look for the "BoxGeometry" page. 3. Under theCode Exampleheading, find the line that saysconst geometry = new THREE.BoxGeometry(1, 1, 1). 4. Convert this three.js line to R3F by writing<boxGeometry args={[1, 1, 1]}>, Observe here, the first letter of geometry is small i.e.boxGeometry. 5. Experiment with changing the values in theargsarray. Each geometry page has detailed information about the arguments that could be used as given in the image. Try them out. 6. Check out the other geometries available in the left side menu and try them out too.
To make our cube look more like a 3D object, let's add
rotationto it. Also, make it bigger byscaleprop.
<mesh rotation={[3.5, 10, 0]} scale={2}>
The rotation prop takes an array of [ X, Y, Z ] axes, try changing the values. Here, the scale prop multiplies the size by 2, so try different values.Add Material to our Cube: Here we are adding the Standard Material.
<meshStandardMaterial attach="material" color="brown" />.
You can change any valid CSS color like "brown" or "#24b700" or "rgb(15,15,185)".
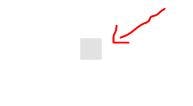
Output:
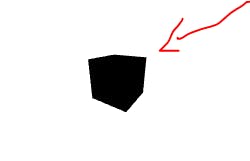
What is this? We added a standard material and set the color to 'brown,' but the cube appears black 🤔. Well, this is because there is no light in the scene. Without light, we cannot see any colors.
Add Lights to our Cube:
Ambient Light provides light from all directions equally and doesn't have a specific source. With Ambient light, the object material is visible now.
<ambientLight />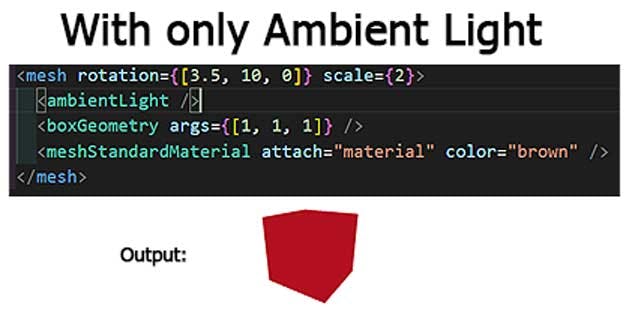
On the other hand, Point Light is like a real-world light bulb, which has a light flowing from a specific direction and source. It will illuminate objects in the scene, create shadows, and add highlights and shading. Here
positionprop takes an array with three values: [10, 10, 10]. This means that the point light will be located 10 units away from the origin in the X, Y, and Z directions respectively<pointLight position={[10, 10, 10]} />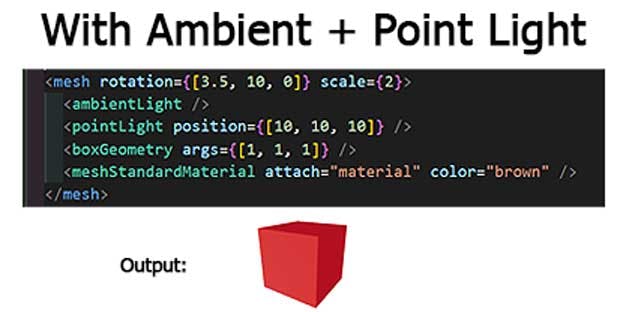
Final Code:
 // App.js
 import React from "react";
 import { Canvas } from "react-three-fiber";

 // Cube Component
 const Cube = () => {
   return (
     <>
       <mesh rotation={[3.5, 10, 0]} scale={2}>
         <ambientLight />
         <pointLight position={[10, 10, 10]} />
         <boxGeometry args={[1, 1, 1]} />
         <meshStandardMaterial attach="material" color="brown" />
       </mesh>
     </>
   )
 }

 // App component
 const App = () => {
   return (
     <>
       <Canvas>
         <Cube />
       </Canvas>
     </>
   );
 }

 export default App;

Summary
Create a React app.
Install the
threeandreact-three-fiberlibraries.Create a
<Canvas>component to display the 3D model.Inside the
<Canvas>, add a 3D object component like<Cube />.Now, create a
Cubecomponent on top of the App component. Write<mesh> </mesh>inside it. (Mesh = everything inside the canvas i.e lights, shadows, 3D object, etc)Inside the
<mesh>, you can place lights and the 3D object's geometry.
Author's Opinion
To fully understand this tutorial, it's essential to have a basic knowledge of Three.js. If you face any difficulties, feel free to comment below, we are here to help you.
I've simplified this tutorial to make the fundamental steps clear. My advice to all of you is to avoid jumping straight into creating super-cool 3D animations as you may struggle to understand the basics.
In this tutorial, you have learned to create a 3D object. It's now time to experiment with different geometries and create new models. 😊